Follow @slikkfitness on Facebook, Instagram, Twitter, and TikTok for more
The 4 Best Deadlifting Cues
If weakness is the disease, then deadlifting is the cure. Deadlift more weight safely by adopting these four easy-to-master cues.
Deadlift Technique: 4 Simple Cues
While mastering the deadlift can get complex, most people would instantly improve their technique if they adopted four easy-to-remember cues.
You’ll find those four cues in the video above. But just to make it fun, here’s how they come into play during a real live deadlift assessment with Dani Shugart at T Nation headquarters.
1. Armpits Over Bar With Maximal Hamstring Tension (Video: 7:15)
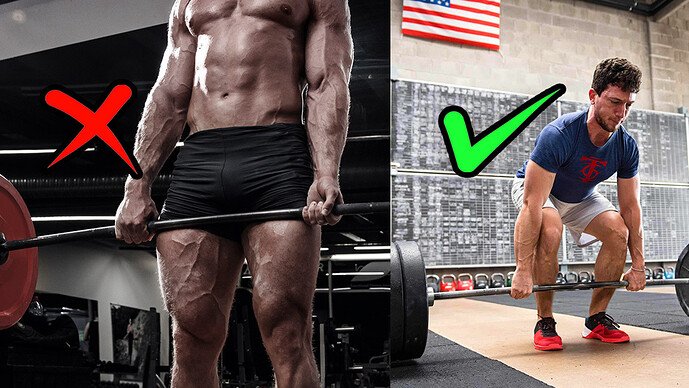
When setting up to deadlift, it’ll behoove you to have your hips as close to the barbell as possible (shorter moment arm to overcome).
But when a lot of lifters hear “hips close to the bar,” they tend to squat down toward the floor. In theory, this sounds like a good idea, but in actual practice, it INCREASES the horizontal distance from the bar… not to mention placing most of the tension on the quads.
Note: Some lifters are very successful with this approach. I’m not implying it’s wrong per se. But it’s the exception, not the norm.
Moreover, if the hips are set too high, this increases the vertical distance from the barbell and also tends to push the shoulders forward in front of the bar, which results in a cascade of events that’ll almost always place more stress on the lower back.
There’s a bit of a Goldilocks scenario here. Where the hips end up is a bit different for everyone based on their anatomy. But if I say “armpits over the bar,” followed by “find your hamstrings,” that helps to get each lifter in just the right position to have an efficient line of pull to maximize their ability to lift the weight safely and not make my corneas perpetually bleed.
To simplify things further, I’ll say, “push the car door shut with your hips.” This enforces the hinge pattern (not the squat pattern) and helps to better engage the hamstrings.
2. Wedge and Connect the Bar (Video: 7:50)
When many lifters initiate their pull, they immediately lose position, and their lower backs will round, or their hips will rise too soon. The “lifter’s wedge” helps to counteract this.
What should happen is that when the lifter bends over to grab the barbell, he or she will use it as a counterbalance to help get their weight back (armpits over the barbell), protect their lower back, and increase full-body tension.
To use an impressive reference point, Chris Duffin of Kabuki Strength often reinforces the importance of the wedge and how crucial it is to ramp up full-body tension. He needs a minimum of 405 pounds on the bar to perform it effectively. Anything under that and the barbell comes off the floor before he even initiates his pull.
Furthermore, there’s a common cue used by many coaches that coincides with the wedge: Get slack out of the bar.
Remember in The Matrix when that creepy kid in the Oracle’s waiting room bent the spoon with his mind and then looked at Neo and said, “There is no spoon.” And then Neo, flabbergasted as shit, was like, WTF?
That’s what I think most people feel like when they’re told to get slack out of the bar.
What does it even mean? In short, all it means is connecting the bar. What we’re trying to do here is connect the barbell with the inner cylinder of the weight plates. (Video 9:00 mark.)
As you bend over and grab the barbell with each hand and begin your wedge, you want to hear two clicks on each side – this is the barbell “connecting” to the plates. It’s an integral component of ensuring better tension prior to the pull.
3. Squeeze Oranges In Your Armpits (Video: 9:30)
Speaking of connection: Your lats are what connect YOU to the barbell. It helps to think of your arms as two ropes. You want to avoid any slack in those ropes. Ensuring you have your lats on throughout the execution of the set helps to accomplish this.
The more kinesthetically-aware peeps in the crowd may be able to turn their lats on merely by someone telling them to do so, but most people can’t.
Using the cue “squeeze the orange in your armpits” has been a game-changer. Try it.
4. Push the Floor Away (Video: 11:24)
Lastly, as oxymoronic as it sounds, the deadlift is very much a pushing exercise rather than a pull.
A key component of the deadlift is to put force into the ground. This helps prevent the hips from coming up too fast and to maintain full-body tension. Catching onto a theme here?
Ideally, we want to see a synchronous action between the hips and shoulders – they move simultaneously – as one initiates the pull (er, push) off the ground.
Want more? Check out How to Deadlift: The 9 Best Coaching Tips.
Coach- what suggestions would you give for the trap bar DL besides 2-4?Thanks
I have found that “correct” hip location is where your hips end up when you set the bar down (doing reps that are easy enough that you are not concentrating on form, but heavy enough to feel the weight. Something you can do for 10 to 15 reps.)
You need your first rep to mirror the reps that follow.
Download the Slikk Fitness app for iOS for more exclusive content

